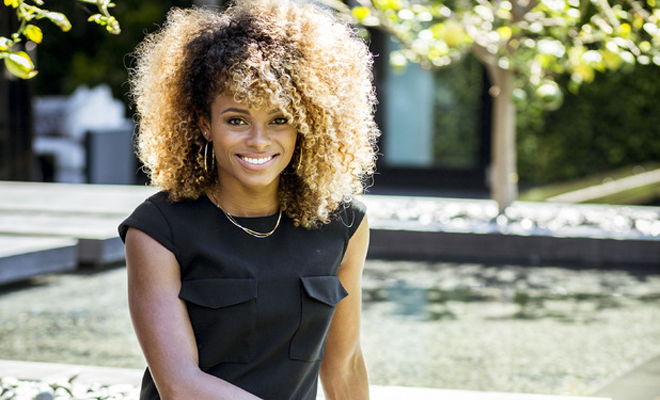
Are you a curly queen that struggles with dried out, shrunken kinks, curls and coils? Do you find yourself regularly combating frizz, and have been desperately searching for a styling solution that is able to provide substantial holding power, stretches out curls, adds significant shine, and beautifully highlights each and every curl pattern within your hair unique curl composition? Well, Miss Jessie's has the perfect product solution for you- Miss Jessie's pioneer product that helped kick off the natural hair care movement of the new millennium, revolutionizing the entire hai care industry, Curly Pudding. Known as the "smooth operator", Curly Pudding is essential for transforming parched unruly strands into shiny, gorgeous, stretched out curls. Styling and sculpting curls has never been easier, with Curly Pudding. Discover how to twist wet hair naturally with Curly Pudding by checking out this tutorial and seeing the results for yourself! source: youtube.com
How to twist Wet Hair & What You Need for a Wet Twist Out:
- Miss Jessie's Curly Pudding
- Hair Clips (to section hair)
- Small Curling rods (for the ends)
- A Hair Pick
For Immediate Drying:
- A Round Hairdryer or Diffuser (optional)
For Air Drying:
- A silk scarf or bonnet (optional)
- Bobby pins and Spin pins (optional)
For Additional Softness:
- Miss Jessie's BabybutterCreme or Curly ButterCreme
- *Recommended especially for curly textures that appear more prone to dryness
Source: Bossip.com
Two strand twists are a great protective style that helps to effortlessly define your curl structure, while also creating consistency throughout your curl patterns. Wear your hair still twisted for a cute look at the office or over night in a silk bonnet or scarf (to prevent frizz), then transform your look completely by releasing a wave of gorgeous curls in a wet twist out. Though this video effectively provides the general gist for how to do a proper wet twist out, allow me to elaborate further on the steps in the video:
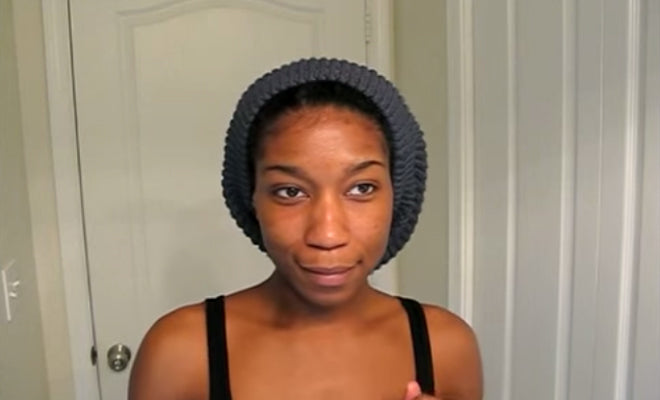
Step 1: After cleansing hair with a gentle shampoo and conditioner, section hair damp hair.
Step 2: While hair is still wet, apply Curly Pudding or Unscented Curly Pudding, from root to ends, gently raking through hair with the product. Note that these products create a firm hold, so we recommend also applying a small base of either Curly Buttercreme or Baby Buttercreme in conjunction with Curly Pudding, as these moisturizing stylers will leave curls feeling soft.
Step 3: Divide and section hair, using the hair clips. Take each individual section and begin twisting hair. For tighter curls and coils, make smaller twists.
Step 4: Using the curling rods, wrap up any lingering straight ends. If you are doing an overnight twist out and preparing hair for the next day, wrap twists up in a silk scarf or bonnet and allow hair air dry as you sleep. Don't have time to wait for hair to dry naturally? Dry hair with a hot tool that is capable of evenly dispersing heat around curls- if you have access to a round hairdryer, as featured in the video, great! If not, you can use a diffusing nozzle on your blow dryer, as the round shape of this attachment is much more conducive to protecting your curl's structure. This is because a flat-nosed attachment or no attachment at all applies an extreme amount of intense direct heat to hair, making hair more vulnerable to damage, and the structure of a diffuser attachment allows the heat of the hairdryer to be more evenly distributed, drying hair effectively without causing a significant amount of breakage.
Step 5: Untwist hair. For additional volume, separate and stretch hair with a pick. My Shortcut Suggestion: So you are a working curly girl on the go, who is too exhausted from a long day on your grind, to twist hair overnight. You can wash and twist hair in the early hours of the AM, but perhaps you slept late and don't have time to completely diffuse dry your twist out. Obviously, don't want to show up at the office with curling rods still hanging off your ends. Well, I have a simple trick that helps soften blunt ends while looking totally boardroom-ready. Once you have made all your two-strand twists, take the twists and wrap them up into a sweet top knot or low bun. You can use regular straight bobby pins to do this, but I also like to use some double helix spin pins as well.

Source: Buzzfeed.com
Though they come in pairs of two, I've found that if your hair is especially thick, you may need to supplement with a couple more straight bobby pins or even an additional spin pin.

Source: Tumblr.com
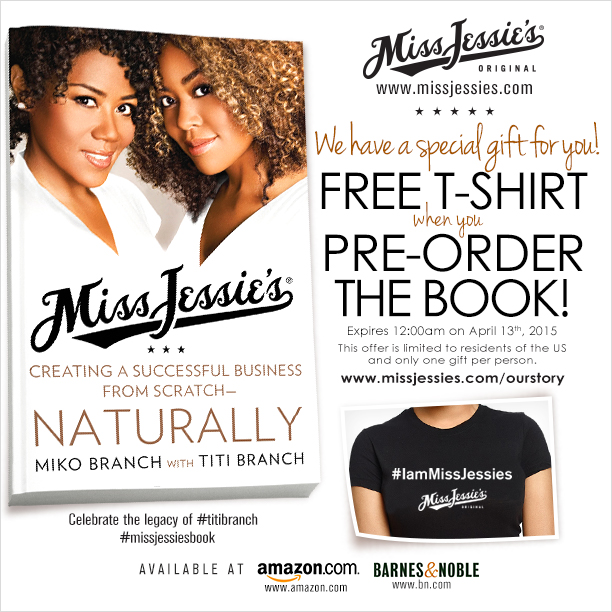
By twisting your twists in this way, it will sculpt and protect your ends as you go about your day, so that by evening your curls will still have ample bounce and you will be good to go. As I stated before, Curly Pudding is the Miss Jessie's product that started it all; Miss Jessie's co-founders, Miko and Titi, literally whipped up the first batch of this now notorious product, right in the kitchen of their home. It's true! To learn more about the first batch of Miss Jessie's Curly Pudding and get a first-hand account of how Miss Jessie's brand came to be, you can pre-ordered your copy of Miko and Titi's upcoming memoir and business guide, Miss Jessie's- Creating a Successful Business from Scratch, Naturally. Also if you pre-order your copy of the book, Miss Jessie's- Creating a Successful Business from Scratch, Naturally before midnight, Eastern time, on April 13, 2015, you can receive a free Miss Jessie's T-shirt, as a complementary gift on us. After placing your order, have your Amazon or Barnes and Noble confirmation number ready and follow the instructions for registering for your gift, on the bottom of the missjessies.com/ourstory page.
Source: MissJessies.com
So don't hesitate curly queens! Order your copy of, Miss Jessie's- Creating a Successful Business from Scratch, Naturally, TODAY!
Sources: 1 | 2 | 3 | 4 | 5 | 6 All images sourced via pinterest